Pastel “Thanks a Latte” Card

Today I’m back with another card using the Hug in a Mug stamp set making a very girly pastel card using Powder Pink, Sweet Sugarplum, and Pool Party, if we still had Mint Macaron then I would have used that too!

First take a piece of Powder Pink cardstock measuring 14.5cm x 21cm and fold and score at 10.5cm to create a card base. Take the Powder Pink ink and randomly stamp the small twinkling star all over the front of the card base.  Continue reading “Pastel “Thanks a Latte” Card”

Sending Warm Thoughts Card

This card is very appropriate for today because warm thoughts and cosy drinks are just what we need in this house. We have one poorly mama and one poorly boy and one little monkey bouncing with energy, so I would love someone to come over and make me a lovely soothing drink.

So if you need a quick card to send to when someone is ill or just to let them know you’re thinking of them then this card and the Hug in a Mug stamp set is perfect.

sendinghugscard

First take some Whisper white cardstock measuring 14cm x 10cm and run through the Bigshot with the Cable Knit Dynamic Embossing Folder. Take some of the Quilted Christmas 1/4″ Ribbon and fasten across the card in a cross pattern as shown above. Mount this layer onto a card base measuring 14.5cm x 10.5cm using Fast Fuse Adhesive.

sendinghugscloseup

Next take the largest Stitched Shaped Oval Framelit and cut it out of Whisper White, then take the corresponding scalloped oval from the Layering Ovals Framelits and cut that out of Real Red.

Use Memento Tuxedo Black ink to stamp the greeting and cup outline and some steam. Take the inner cup stamp and ink with garden green, stamp off once onto scrap paper and then stamp in the cup outline. Finish the stamping by stamping a Real Red heart into the middle of the cup. To add a little sparkle I coloured the cup with the Clear wink of Stella brush.

sendingwarmhugsrealreadcardinside

For the inside of the card I just stamped the cup image again onto Whisper White cardstock measuring 14cm x 10cm. I love how versatile the Hug in a Mug stamp set is, the comforting sentiments and cute little mugs make it a great set to pick up for all year round.

Thanks for popping by today, I’m now off to hibernate in my duvet until tomorrow.

Happy Crafting

Joanne x


Christmas Sparkle Coffee Cup Card

When I think of Christmas I immediately think of all things sparkly, Christmas lights, stars, pretty packages so for today’s card I’m adding some extra sparkle to my project with the Gold Glimmer paper. This stuff is fabulous, super duper sparkly and hardly any glitter loss, plus a little bit really gives your project the wow factor.

Once again I’m using the Coffee Café bundle and the Merry Café stamp set for my card, I love how easy a card comes together with these products. I started today’s card with a card base in Cherry Cobbler measuring 14.5cm x 21cm, scored and folded at 10.5cm. I next took a strip of the black coffee cup paper from the Coffee Break DSP measuring 14.5cm x 8cm and stuck this to the card base.

goldglimmercoffeecupcard

Next I took the Decorative Ribbon Border punch and punched a full 12″ length of Gold Glimmer Paper, I cut this to two strips of 14.5cm and stuck it onto the card front using multipurpose adhesive sponged on the back.

I next stamped and cut out the pieces for the coffee cup and the stitched oval, including a gold glimmer coffee lid for the cup. I glued these two the stitched oval  and finished the card off by adding the gold glimmer edging to the coffee cup wrapper. These gold strips were the offcuts from using the punch and fit the wrapper perfectly and also add some extra sparkle.

goldcoffecupcloseup

I’m yet to decorate the inside of this card but I’m thinking one of the cute little coffee cups with the heart on which are on the black paper will look good in the bottom right corner.

Happy Crafting

Joanne x


Hello Fall Coffee Cup Card

With Autumn truly started now this weeks theme is Cups and Coffee to celebrate those comforting drinks we all enjoy at this time of year. So today’s card is celebrating that autumnal favourite the Pumpkin Spice Latte. This doesn’t sound an appealing drink to me as I’m not big on any kind of spicy drink but I know for some of you the season isn’t complete without one or ten of these.

So to start todays card I took a card base measuring 14.5cm x 21cm, scored and folded at 10.5cm in Pumpkin Pie…what else? I next took a piece of designer series paper from the Painted Autumn pack measuring 14.5cm x 8cm and adhered this to the left side of my card.

hellofallcoffecupcard

I then took a strip of Early Expresso to create a boarder between the designer series paper and the card base.  Mine is about 0.7cm in width. I cut most of my A4 to 21cm x 29cm to make to two card bases measuring 14.5cm x 10.5cm, so I always have a little offcut left over. I find these super handy if you just want a little something to add to your card/

I next created the frame using the 6cm scalloped square and  the slightly smaller straight square from the Layering Squares Framelits. You’ll know you’ve got the right one because it fits perfectly inside the scalloped square. Cut the frame out of Early Expresso, then cut a 6cm square out of Very Vanilla for the back of the frame. Before sticking the two pieces together take some Linen Thread and wrap around the bottom left hand side of the frame and finish with a bow.

hellofallcoffecupcloseup

Next take the dotted patterned paper from Painted Autumn and stamp the large coffee cup from Coffee Café in Early Expresso. Take some Very Vanilla cardstock and stamp the cup wrapper in Early Expresso, then take Pumpkin Pie and stamp the leaves all over the wrapper, making sure some are stamped over the edge. Finally take the Hello Fall greeting and stamp in Early Expresso. Cut these out using the Coffee cup Framelits and also a coffee cup lid in Early Expresso. Stick your coffee cup together using multipurpose liquid glue. Then add to your card using Stampin Dimensional’s.

hellofallcardinside

For the inside of the card I took a piece of Very Vanilla measuring 14cm x 10cm and stamp Pumpkin Pie leaves along the bottom.

Hope you’ve enjoyed today’s card, pop back tomorrow for a Christmas version.

Happy Crafting

Joanne x


Copper & Fresh Fig Star Card

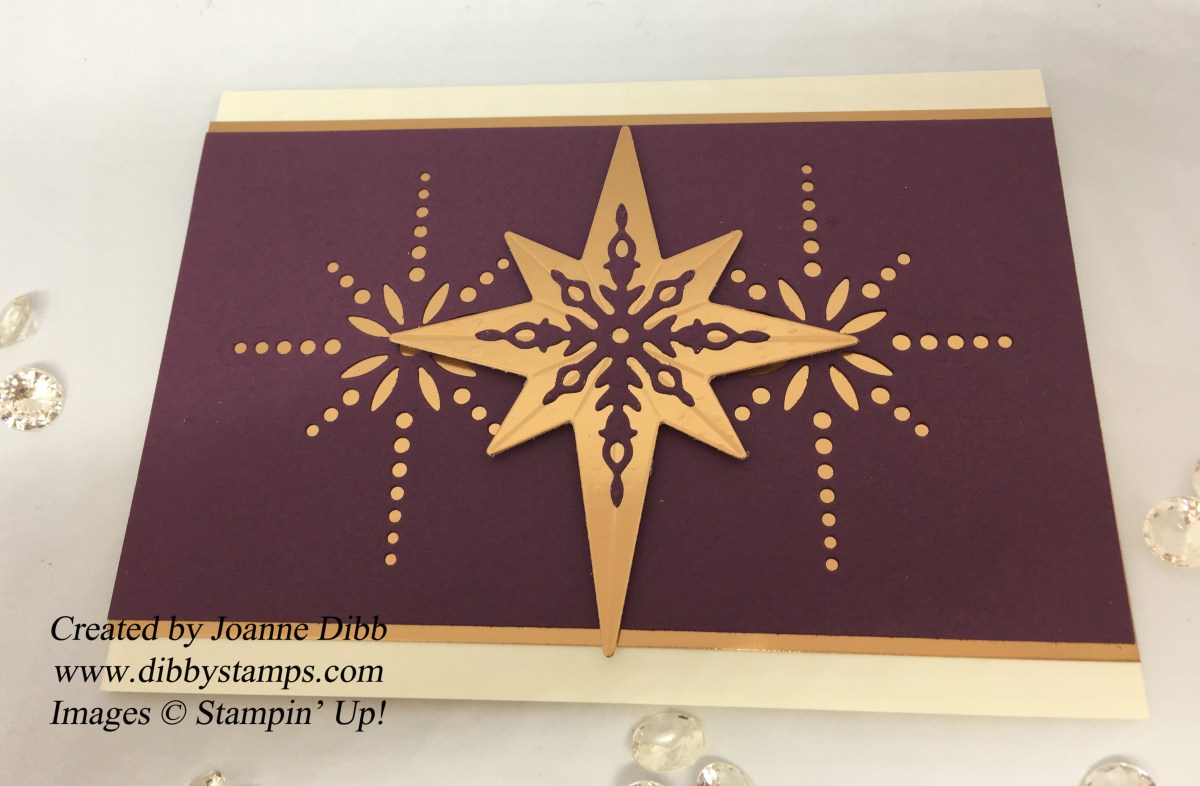
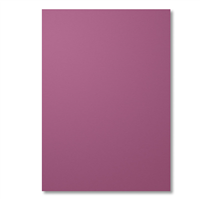
My final project for Stars and Snowflakes week feature the Starlight Thinlits once more but this time I have gone for a very modern look using Copper, Fresh Fig and Very Vanilla. I’ve not used a greeting on this card so it can be used for any occasion throughout the winter season. I think this card would work very well as a party invite or even as a thank you note for all those Christmas gifts.

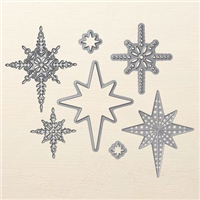
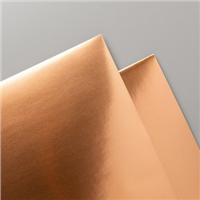
This was a very quick and simple card to make but I think still have a wow factor because of the gorgeous copper foil used. To make the card first take a piece of Fresh Fig measuring 14.5cm x 8.5cm and take the die with many dots shaped as a star, lay this straight on the cardstock around 0.5cm from one edge, run through the Bigshot and  then repeat at the other side. Line the middle row of dots up with the previous cut to ensure the stars are straight.

figstarcardfront

Next cut a piece of Copper foil measuring 14.5cm x 9cm and glue behind the Fresh Fig piece of cardstock, taking care not to get adhesive where any of the holes are. Then stick this to a Very Vanilla card base measuring 14.5cm x 21cm, scored and folded at 10.5cm.

For the focal point of the card cut out the star die which has embossed lines on it in Copper foil and the small detailed star in Fresh Fig, use the multi-purpose adhesive sheets to stick them together easily.

Use some Stampin’ Dimensional’s to stick the die cut star to the centre of the card, the outside of the card is now complete.

figcopperstarinside

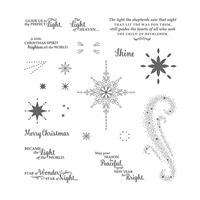
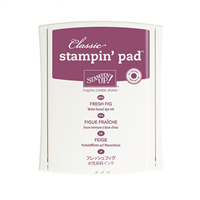
To finish the inside of the card I stamped two of the medium solid stars from the Star of Light stamp set in Fresh Fig ink.

I just love the simplicity of this design, I think it could be my favourite card off the week.

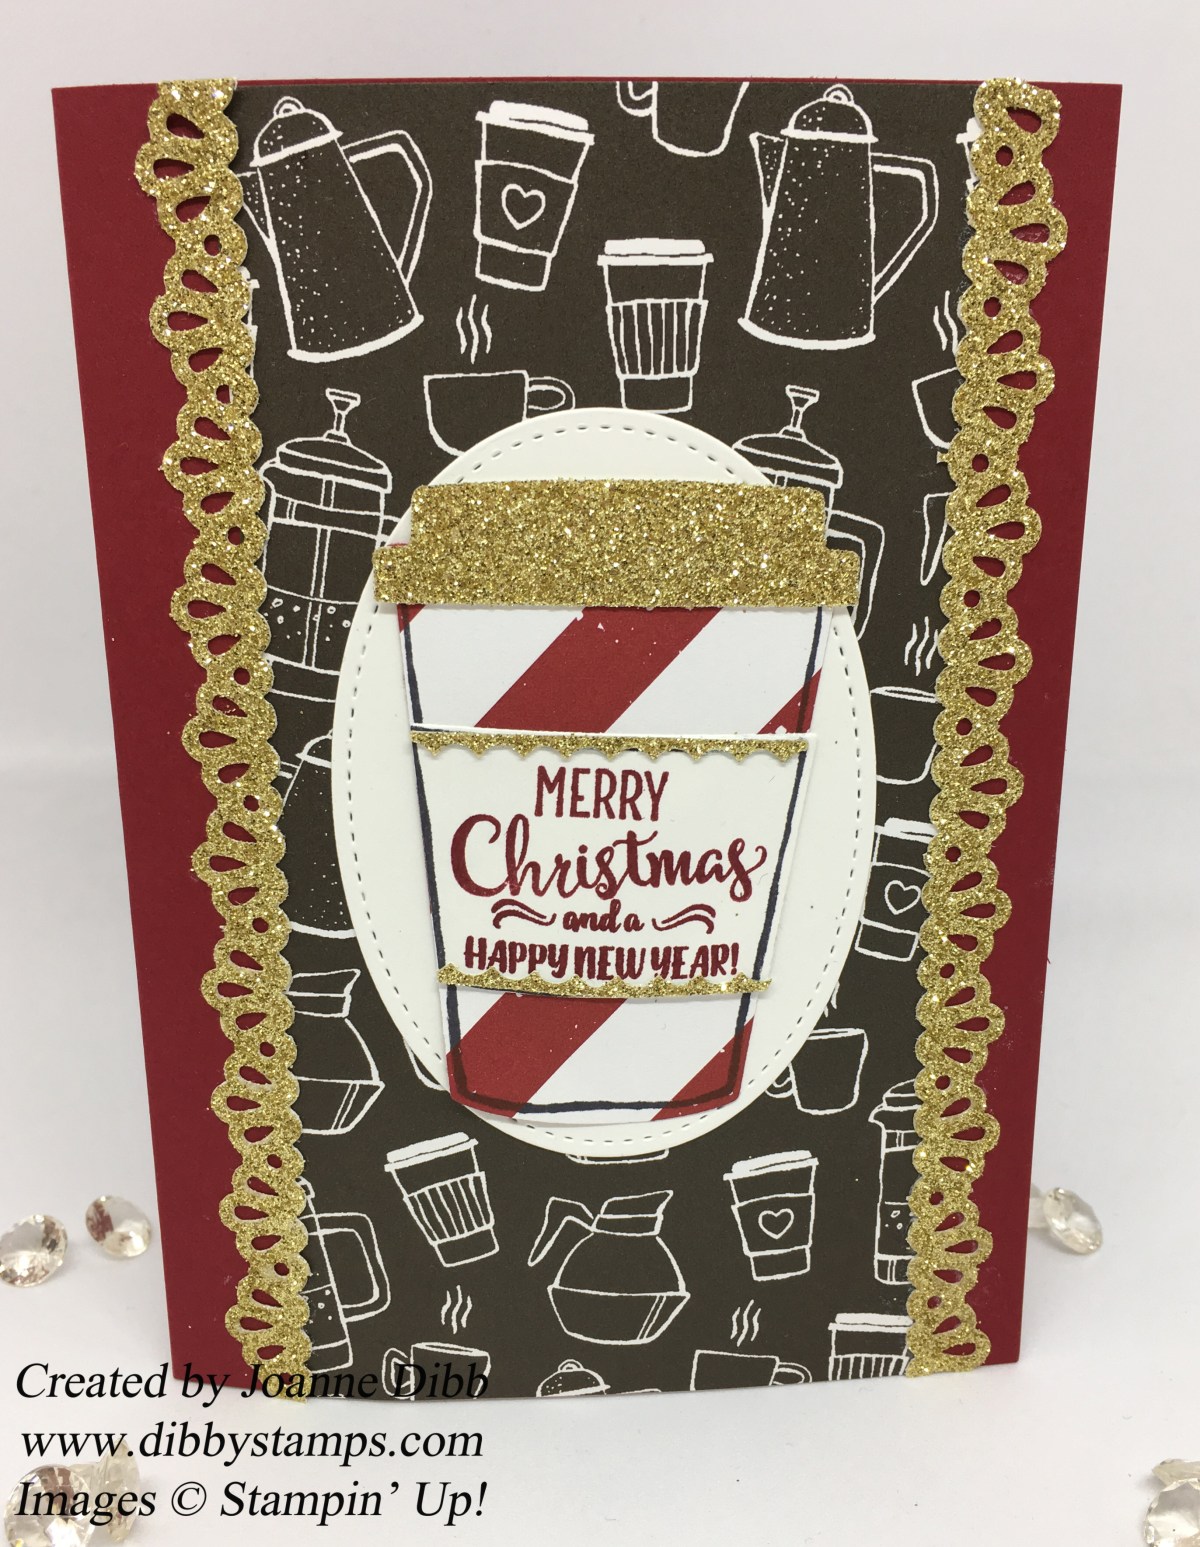
Join me tomorrow when I’ll be starting Coffee and Cups week.

Happy Stamping

Joanne x