Pootler’s Design Team – The Little Things Week Five

14088395_10153745365531603_281310922678395855_n

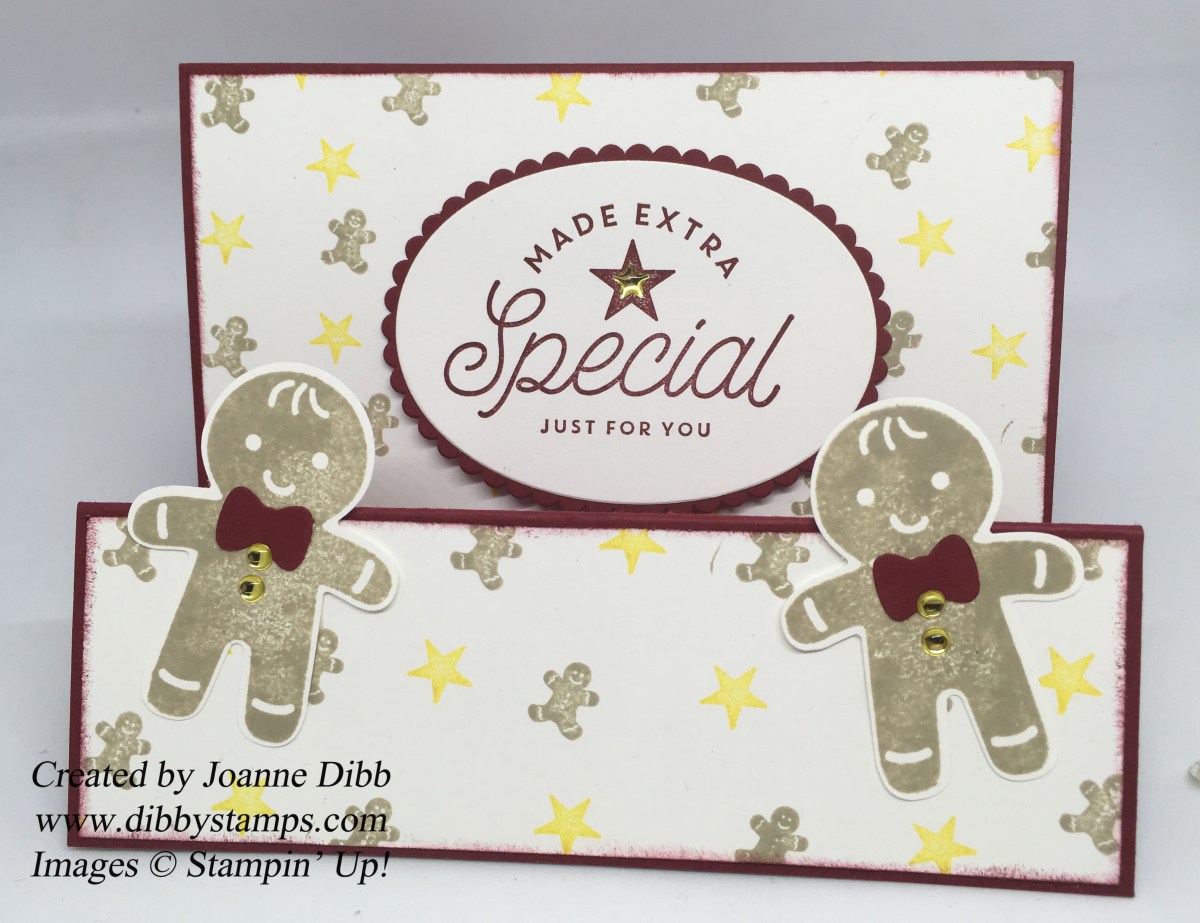
Today’s its my final project working with The Little Things stamp set for the Pootler’s Design Team. I’d just like to take this opportunity to thank the awesome Sam Hammond at http://www.pootles.co.uk for organising the design team and giving some of us the chance to be featured on her blog. I’ve had a great time working with this stamp set and can see those little gingerbread men featuring heavily on my Christmas cards this year.

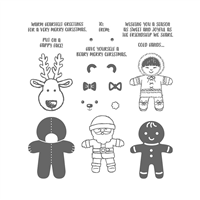
Talking of the cute little gingerbread man he’s making one final appearance this week along with his big brother from Cookie Cutter Christmas.

pdt - the littlethings week 5-2

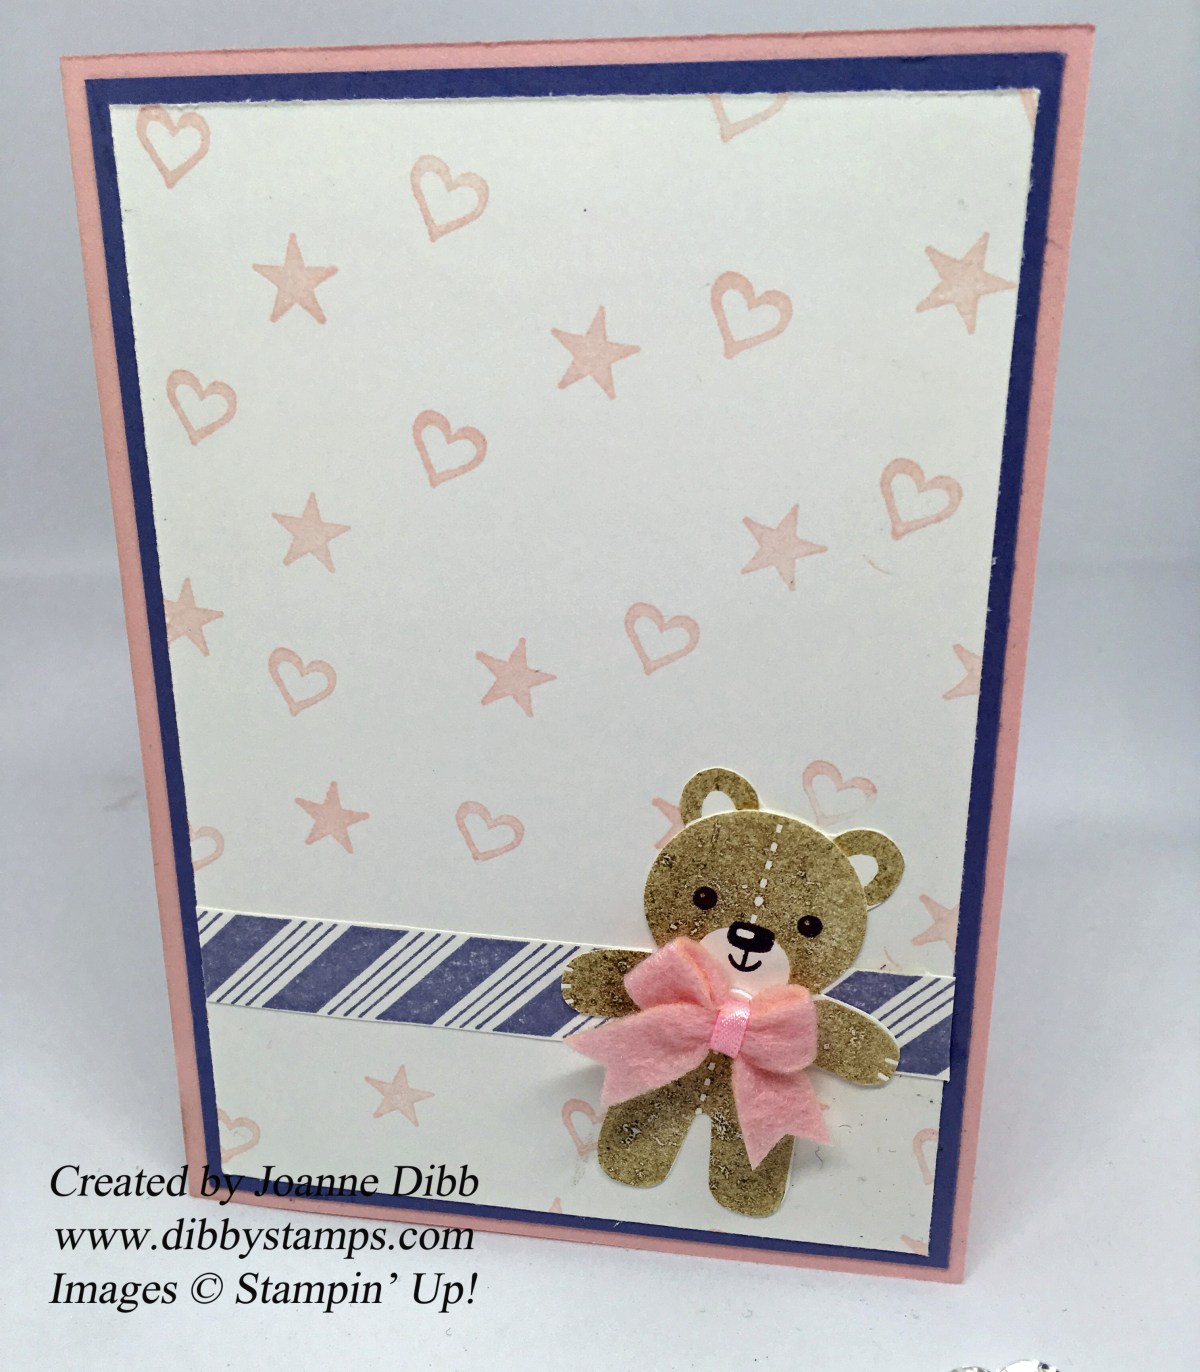
The card base was made from a piece of Cherry Cobbler 12″ x 12″ card measuring 6″ by 12″ and is scored at 4″, 8″ and 10″. Fold the card to make two mountains. Take two pieces of Whisper White cardstock one measuring 3 7/8″ by 5 7/8″ and one 1 7/8″ by 5 7/8″ and randomly stamp the tiny gingerbread man and the star from The Little Things all over.

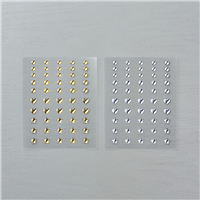
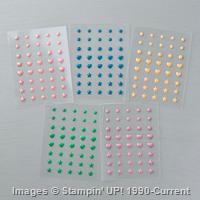
Next stamp two gingerbread men from Cookie Cutter Christmas in Crumb Cake and punch out with the Cookie Cutter Builder punch. Also punch two bows in Cherry Cobbler. Adhere the bows to the gingerbread men and cover the buttons with the smallest gold enamel dots from the Metallic Enamel Shapes.

pdt-the little things week5-1

For the greeting stamp the Made Extra Special stamp from The Little Things and cut out with the second largest oval from the Layering Ovals Framelits. Cut a corresponding scalloped oval out of Cherry Cobbler.

To finish the card fold both sections flat the run Fast Fuse adhesive along the top of the Scalloped Oval, stick into the centre of the card overlapping the front panel with the in-glued half of the oval. Add the two gingerbread men to each side of the oval on the bottom section with glue just on the bodies. Finish the card with a Gold Enamel star in the centre of the greeting.

Hope you enjoyed my last project featuring The Little Things, next week a different team will take over with a new stamp set so go check them out at http://www.pootles.co.uk

Happy Crafting

Joanne x


Pootler’s Design Team – The Little Things Week 4

14088395_10153745365531603_281310922678395855_n

This week the stamp “It’s The Little Things” was inspiring me to make a baby card. Now I don’t have any of the specific baby themed stamp sets in the catalogue so decided to use the teddy bear from Cookie Cutter Christmas. As you can see from my card the initial stamp doesn’t even feature on the end result but that’s just the way crafting ends up sometimes!

pdtwk4-2thelittlethingsstampinup

I chose to use a colour scheme of Wisteria Wonder, Soft Suede and Powder Pink, just so I could add one of those cute little bows onto the teddy bear, doesn’t he look adorable.

The background was created with the small heart and star stamps, I’m really loving these for creating your own background paper, so very versatile. I also added a strip of the diagonal stripes for somewhere for teddy to sit.

pdtwk4-3thelittlethingsstampinp

As I mentioned I was going to add the “It’s The Little Things” stamp as a greeting but I just don’t think this card needs a greeting, what do you think?

Anyway, hope you can join me next week for my final project on the Pootler’s Design Team.

Happy Crafting,

Joanne x


Pootler’s Design Team – The Little Things Week Three

14088395_10153745365531603_281310922678395855_n

Wow I can’t believe were are in the third week of November already, have you started getting ready for Christmas yet? I’m working my way through my list but one of the most difficult people to buy for is my husband as the only thing her ever want at Christmas is sweets. So this year I’ve decided to wrap some of his favourites up a little differently using my Stampin’ up! supplies and where better to start than the SWEETs stamp in The Little Things Stamp set.

pdtwk3-1

As you can see I went with a romantic theme rather than a Christmassy one as that little heart stamp is just the cutest, I actually think I could have added a lot more hearts to my stamping as there are quite a few gaps…oh well.

To make the box I used Thick Very Vanilla cardstock and Calypso Coral ink and Ribbon. The inside draw of the box is made for a piece of cardstock measuring 4″ x 10″ . Score the short side at 1″ and 3″ and the long side at 1″ and 9″, which leaves you with a grid pattern.

pdt-thelittlethings-wk3-5

Cut inside the score lines on the short side on the insides of the outer small rectangles and diagonally across each corner. Fold each triangle that is left in to create the ends of the box.

For the outer box take a piece of cardstock measuring 8 3/8″ by 7″. Stamp your decoration all over the card. Next turn your card on the 7″ side, then score at 1 1/16″, 2 1/8″, 4 1/8″ and 5 1/16. Burnish all the score lines and the run Fast Fuse all the edge of the largest section. Wrap this piece of card around the box to create a sleeve so the inside box can slide in and out.

pdt-thelittlethings-wk3-3

To create the label I stamped the SWEETS stamp in Calypso Coral and punch out using the Pretty Label punch, to make it stand out I punched out another two labels in Calypso Coral and used them as a border.

pdt-thelittlethings-wk3-4

To finish the box I wrapped some of the Ombre Calypso Coral Ribbon around and secured it to the top of the box behind the label.

Hope you enjoyed today’s project and look out for more sweetie packaging ideas in the next few weeks.

Happy Crafting

Joanne x


Pootler’s Design Team – The Little Things Week 2

14088395_10153745365531603_281310922678395855_n

For this week’s project for the Pootler’s Design Team I really wanted to make something which wasn’t a card. When I look at The Little Things stamp set and that striped stamp images of decorated pegs keep coming into my head (don’t ask me why) so decorated pegs is what I have made.

pdt-thelittlethingswk2-2

I stamped out the stripe stamp eight times in Emerald Envy because I felt like giving the pegs a bit of a festive vibe. I cut these out and adhered them to normal washing pegs front and back using tear and tape. I went with this option as I have plastic pegs and thought it would be the least messy.

I next stamped out the gingerbread men and the stars and then punched them out using the 3/4″ circle punch. I then punched four 1″ circles out of Real Red and stuck my stamped image onto them. Again fixing them onto the pegs using the tear and tape.

I have used these pegs to fasten up bags of sweets, which we have loads of in our house as my husband has a massive sweet tooth. They could also be used to fasten up other food bags in the kitchen. I may also make a few more and use them to fasten Christmas cards to some hung up ribbon.

pdt-thelittlethings-wk2-1

Hope you enjoyed today’s project and join me next Thursday for another project using The Little things stamp set.

Happy Crafting

Joanne x


Pootles Design Team My Hero – Week 1

14088395_10153745365531603_281310922678395855_n

Today I’m happy to announce that for September I’m part of the Pootles Design Team. For this we are given one stamp set and asked to create a project for every Thursday in the month. The stamp set that we were given for September was My Hero, which can be found on the inside of the back cover of the annual catalogue, just in case you’ve missed it.

myherostampset.jpg

This is a very special stamp set as it is this years Ronald McDonald House Charities stamp set, which means every-time someone buys this stamp set £2.00/€2.25 is given to the charity.

When this stamp set first arrived I was very unsure I was going to be able to come up with one project let alone 5! But after using it a few times its growing on me and one I can see being a popular choice for some quirky greeting.

So here is what I came up with for this week:pootlesdesignteammyherowk1.jpg

First I made the background by taking the celebrate stamp and stamping repeatedly with Sweet Sugarplum, Peekaboo Peach, Mint Macaron and Pool Party, using the Stamp-a-ma-jig to keep it fairly straight.

myherocard1background.jpg

I felt this was a little too bright for a background so I added a layer of vellum, securing it on the back so the layer popped up a little.

Next I punched some balloons in matching cardstock from the balloon bouquet punch, I added a little curve to these by rubbing the backs of each one with the lid of my tombow glue on a foam matt.

myherotip1.jpg

I finished the balloons off with some linen thread and secured onto the card with stampin’ dimensionals. I created the banner by colouring the outline of the celebrate stamp set with the Sweet Sugarplum marker and stamped  a greeting from the Birthday Banners set. I added two enamel stars for an embellishment.

Hope you like my first project and pop back next week to see what else I create with this set. To take a look at what the other members of the team created visit http://www.pootles.com

Happy Crafting

Joanne x