Berry Burst Blossoms

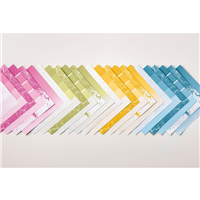
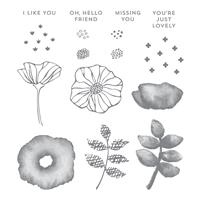
This week I’m featuring cards with products in the World Card Making Day Sale and the DSP buy 3, get 1 sale. Today I’m using the Colorful Seasons stamp set and Color Theory DSP stack, which I combined with a combination of Pool Party, Berry Burst and a hint of Early Expresso.

First I took Berry Burst cardstock and cut a matt layer measuring 14cm x 10cm and then took the Color Theory DSP stack and then chose the Berry Burst White crackle paper and cut this to 13.5cm x 9.5cm.

berrythinkingofyouflowers

I stuck a length of Pool Party Shimmery Ribbon across the middle of the Berry Burst crackle paper and then adhered this sheet to the Berry Burst cardstock layer. I fixed these onto a Pool Party card base measuring 14.5cm x 21cm, scored and folded at 10.5cm.

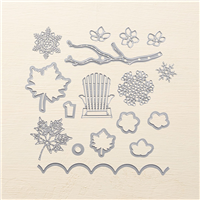
On a piece of Whisper white cardstock measuring 9cm x 7.5cm stamp the branch in Early Expresso and the greeting in Berry Burst. On a scrap piece of paper stamp five flowers in Berry Burst and add the stamens in Early Expresso. I fussy cut these out as I’ve lost my Seasonal Layers Thinlits, but if you have the dies use them.

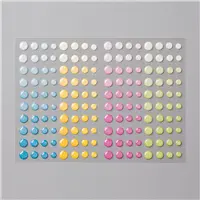
I matted my stamped layer onto a piece of Berry Burst measuring 9.5cm x 8cm and then adhered this to the left hand side of my card. Add the cut flowers to the branch using Stampin’ Dimensional’s. To finish the card off add three of the Berry Burst Glitter Dots in various sizes to the top right hand side.

berrythinkingofyouflowers1

Hope you’ve enjoyed today’s project and join me tomorrow for another project inspired by the sale items.

Happy Crafting

Joanne x


New Stampin’ Up! Offers for October

This October Stampin’ Up! is really spoiling us with so many offers, making this month the ideal time to place an order.   With three different promotions running from today there is sure to be deal to catch your eye.

wcmd_demo-banner_uksp

Firstly to celebrate World Card Making we have a special stamp sale running from 1st October to 10th October with 12 stamp sets  being reduced by 15%. There’s also a great deal on Fast Fuse Adhesive, buy one Fast Fuse Adhesive and get two free refills. Here are links to all items in the sale:

b3g1dsp_current_promo_banner_uk

There is also a fabulous deal on designer series paper buy 3 packs and get your 4th pack for free. So if you’re wanting to try out our great paper this is the month to do it. Here is a list of papers included and below are links to purchase them.

papersale


lp-header_demo_090117_sp-eu

Finally the Merry Patterns Host Promotion is still running from last month, spend over £250.00 in one order or host a workshop totalling over £250.00 and the Merry Patterns stamp set is your for free. It’s a beautiful stamp set which I will be featuring in some projects very soon.

So go and take advantage of these wonderful special offers before there gone.

Happy Shopping

Joanne x

Hug in a Mug Hot Chocolate Card

I have a super quick card to share today using the Hug in a Mug stamp set. If you don’t have this set then this design can be very easily changed to suit any image or sentiment that you want to use.

I took a Thick Whisper White card blank made from card measuring 14.5 x 21cm, scored and folded at 10.5cm. I then took a piece of the Quilted Christmas DSP Stack in Real Red and cut a piece 14.5cm x 4.5cm and adhered this to the front of the card using Fast Fuse Adhesive. To finish the basic card I added a strip of Real Red cardstock across the top of the patterned paper.

hotchocolate card

Next stamp the hot chocolate mug from the Hug in a Mug set onto Whisper White. Use Real Red and Early Expresso ink to add the details. Cut out the image using the Layering Circles Framelits and mount onto a Real Red scalloped circle cut from the same set.

Stamp the sentiment onto the front of the card using Memento Tuxedo black ink. Next take the Versamark ink and the chocolate drop stamp and randomly stamp across the white section of the card, this adds a very subtle detail which I’m not sure is clear in the photos.

hotchocolatecloseup

To finish the card take the scalloped circle topper and stick to the card using Stampin’ Dimensional’s. Add a little Clear Wink of Stella to add a little sparkle.

Hope you have enjoyed me cards for Cups and Coffee week. Join me tomorrow for another Stampin’ Up! project.

Happy Crafting

Joanne x


I Love Coffee Card

For today’s card I’ve gone for sharing the love. A perfect card to send to that special someone who knows how much you love all things coffee.

This card was really quick to make with just a few layers and die cuts. The card base is Early Expresso measuring 14.5cm x 21cm, folded and scored at 10.5cm. The next layer is Powder Pink measuring 14cm x 10cm and then there is a final layer cut from the Coffee Break DSP measuring 13.5cm x 9.5cm.

lovecoffeecard

Next add a strip of the garden green heart paper from the Coffee Break DSP measuring 14.5cm x 4cm. To get the ripped edge measure the paper 14.5cm x 6cm and then take an aqua painter and a ruler and measuring 1cm in from each edge, run the aqua painter down the line and then rip. The water from the aqua painter will soften the paper and give the ripped edges.

Cut the coffee cup out using the Coffee Cup Framelits and Powder Pink and Early Expresso cardstock. Cut out the largest oval from the Stitched Shape Framelits in Whisper white and stick to the middle of the card. Arrange the coffee cup elements on the card as shown in photo.

Stamp the heart from Merry Café in Powder Pink onto Whisper White and adhere to the coffee cup using Stampin Dimensional’s. To make the additional small hearts I used the Window Box Thinlits dies and Powder Pink cardstock. Similar items you could use are the hearts die from Everyday Jars or the heart on the Cookie Cutter Builder Punch.

heartsinside

To finish off the inside of the card I stamped some hearts in Powder Pink in the bottom right hand corner of a piece of Whisper White measuring 14cm x 10cm and stuck to the inside of the card using Fast Fuse Adhesive.

lovecoffeecardfront

Hope you enjoyed today’s card and pop back tomorrow for my final card in Cups and Coffee week.

Happy Crafting

Joanne x


Coffee Cup Gift Card Holders

For today’s post I loved making these Coffee Cup Gift Card Holders so much that I’ve made two versions, a winter themed one and a Christmas one. I can’t decide which is my favourite.

crumbcakegiftholder

For the gift card base take a piece of cardstock measuring 10.5cm x 28cm and score at 7cm and 14cm on the long side. Turn the cardstock round 90 degrees and make a score mark at 5cm. Cut the cardstock from the 5cm mark to the top of the 7cm scoreline, as shown in the picture below. Fold the gift card holder in half at 14cm and then fold inwards at 7cm, that completes the card base.

giftcardscoremap

To make the front half section of the card cut a piece of Soft Sky to 6.5cm x 10cm and a piece of the Coffee Break DSP to 6cm x 9.5cm, layer them together and stick to the front of the card using Fast Fuse Adhesive.

For the coffee cups I used images from the Coffee Café and Merry Café stamps sets and stamped the in Early Expresso ink and then cut out with the Bigshot using the Coffee Cup Framelits. Assemble the cups as shown and fix to the front of the card. When sticking the first coffee cup down be care to only use adhesive on one side so the overlapping part is not sticky.

crumbcakegiftinside

To make the inside of the card take a piece of Whisper White cardstock measuring 13cm x 9.5cm and stamp the  greeting and snowflakes with Early Expresso. Matt the white stamped cardstock onto a layer of Soft Sky cardstock measuring 13.5cm x 10cm and adhere to the inside of the card using Fast Fuse.

To make the gift card holder part run fast fuse along the bottom of the inside flap and up to the 5cm, once stuck down this with create a triangular shaped pocket to insert your gift card.

redgreengiftholder

To make the Christmas version use a Garden Green base and Cherry Cobbler instead of Soft Sky and replace the Coffee Break DSP with the Be Merry DSP. Use a combination of Basic Black Archival and Cherry Cobbler ink for the stamping.

coffeegiftholders

So there are my two projects for today, which do you prefer? I love them both but think the Crumb Cake/ Soft Sky just has the edge.

Happy Crafting

Joanne x