Hey Lady! Thank You Card

The Little Ladybug stamp set has to be my favourite from both the Mini Catalogue and the Sale-A-Bration releases. This  stamp set features four of the cutest little ladybirds I think I’ve ever seen along with some lovely greetings. This is a special stamp set as its only available with orders over £275 and until the end of March, so if you like it nows the time to go shopping and pick up those wishlist items.

I started out by stamping and colouring some ladybirds and flowers. the ladybird is coloured with Poppy Parade Stampin’ Blends and the flower a mix of Pumpkin Pie, Mango Melody, Daffodil Delight and Granny Appple Green.

Hey Lady Thank You Card Flat

I created the frame with the Stitched Rectangle Dies and the Poppy Parade Cardstock and Pleased AS Punch DSP. The card base is Balmy Blue and I stamped the large flower across the background in Balmy Blue to add more interest.

For my greetings I used the Special Day Dies to create speach bubbles so it looks as if the Ladybug is talking.

Happy Crafting

Joanne x

Supplies:


Floral Friday: Needlepoint Nook Trio

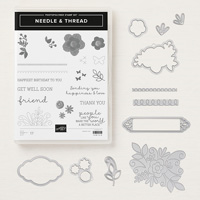
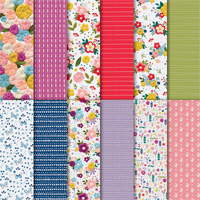
For today’s Floral Friday post I’m saying a fond farewell to the Needlepoint Nook Suite from the Spring/Summer catalogue. This suite is jam packed with embroidery and stitching images which remind me so much of cushion covers from my childhood which my grandma stitched. If like me you love a bit of stitching or some nostaligia then this is a great collection to play with.

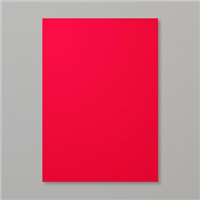
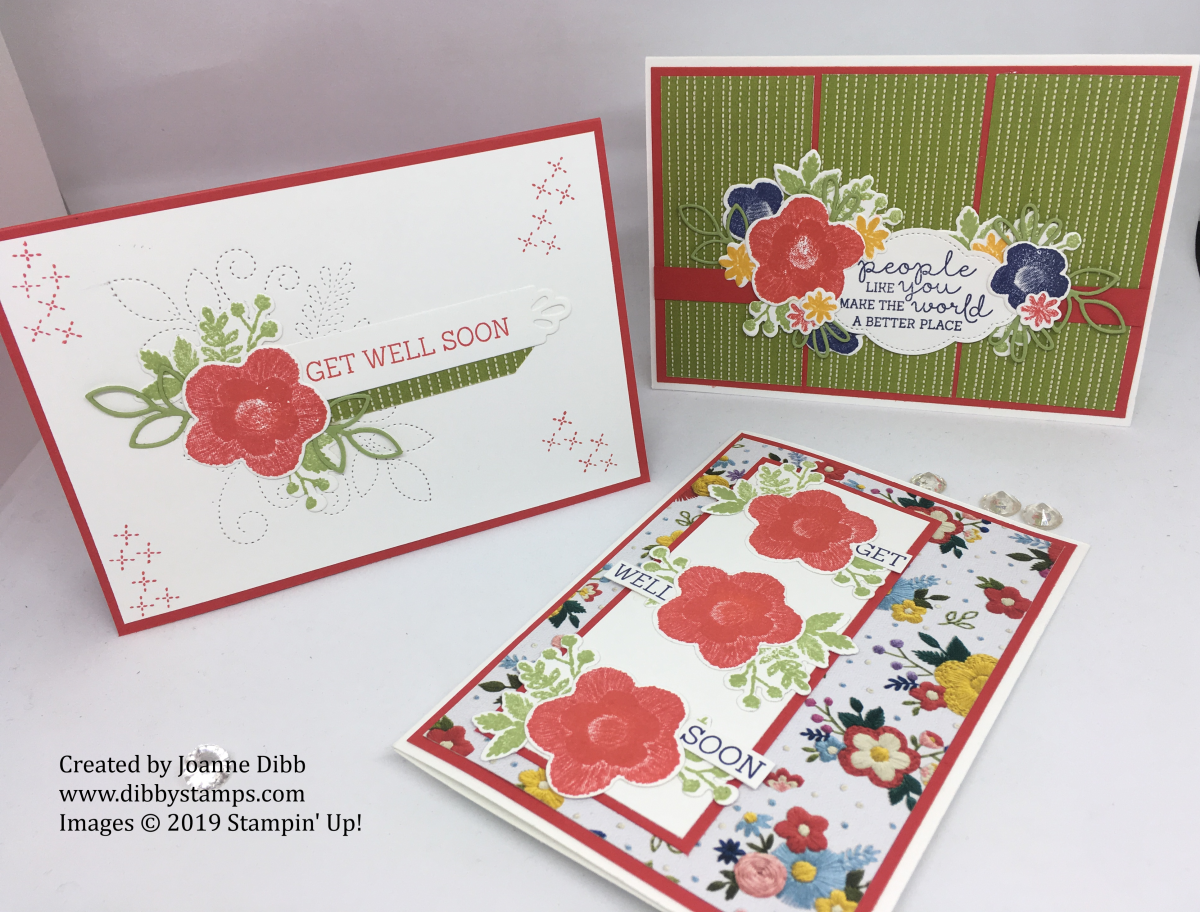
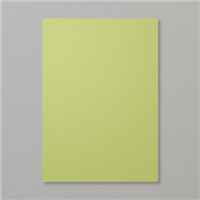
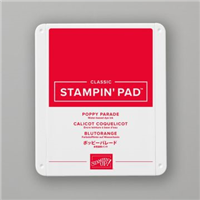
For my cards today I focused on the large flower head image as starting  point for my project and the colour combination of Poppy Parade, Pear Pizzazz, Night of Navy and a hint of Crushed Curry.

Floral Friday - Neddlepoint Nook 1

I used one of the busier patterns for this background so wanted my focal point to be quite bold so it didn’t get lost in all the colours behind. I chose three Poppy Parade flowers with the matching leaves in Pear Pizzazz. I love how these two stamp/die comibnations work perfectly togther to create stunning elements simply. To finish this card I just stamped the greeting ” Get Well Soon” in Night of Navy and cut up the seperate words and adhered one to each flower.

Floral Friday - Needlepoint Nook 2

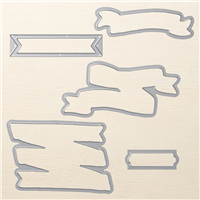
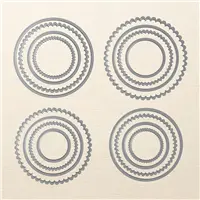
for this second card I started by using the largest die in the set which creates this lovely stitched effect in the cardstock, which is great for some subtle detail. I again added one of the Poppy Parade and Pear Pizzazz flower combinations with a couple of extra die cut leaves. I stamped the greeting onto the lovely label die included in the set and highlighted that with a small strip of patterned paper. I finished the card off with some stamped Poppy Parade stiches in the corners.

Floral Friday - Needlepoint Nook 3

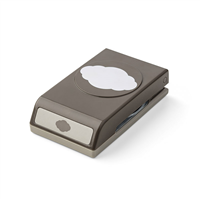
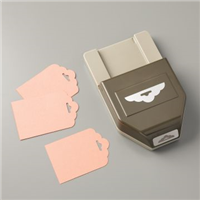
For my last card I went a little die cut crazy and threw a whole bunch of different flowers and leaves onto the card to make this gorgeous floral arrangement. The greetings label is made from using the Pretty Label punch. First stamp your greeting and then take the stitching die from the Needlepoint Elements and run through the die cutting machine and then simply punch with the Pretty Label punch and you have a label with gorgeous stiching all around it.

Hope you’ve enjoyed today’s projects, I’ve loved pulling out the Needlepoint Nook Suite again, lucky for me I have plenty of paper left so can make plenty more projects.

Happy Crafting

Joanne x


Poppy Parade Santa Christmas Card

For today’s card I’ve gone for a mainly monochromatic colour scheme using Poppy Parade, I love this colour its such a happy vibrant red and works so well as the colour for Santa’s suit.

The background was created using the Buffalo Check stamp and the greeting came from the Peaceful Poinsettia set. The big curvy sentiments were the reason I bought this set and I can’t wait to use it some more.

Poppy Parade buffalo Santa card close up

The cute little Santa comes from the Signs of Santa set and has been coloured with Stampin’ Blends, the Dark Mango Melody on his belt really stands out among all the Poppy Parade.

To add some extra interest I stamped a banner from Banners For You in tone on tone Poppy Parade and added this die cut behind my sentiment. I finished the card off with one of the Snowflake Trinkets which are available as part of the November Snowflake Showcase.

Poppy Parade buffalo Santa flat

Hope you’ve enjoyed today’s project as much as I’ve enjoyed creating it.

Happy Crafting

Joanne x


Santa’s Wishlist Bookmarks

Today’s project has been in my head since I first saw the catalogue back in August, a  little bookmark using the cute Santa from the Santa’s Workshop suite. I’ve seen a few variations on Pintrest so this must be a common idea amongst us crafters. It does help that this suite is perfectly co-ordinated meaning simple projects like this are easy to recreate and perfect for those up and coming Christmas markets.

The base of the bookmark measures 21cm x 5cm ( 8″ x 2″) and was cut from Poppy Parade. Each of the bottom corners were rounded using the new Detailed Trio Punch and for the top I used the Scalloped Tag Topper. The stripy layer is cut from the Santa’s Workshop Speciality Designer Paper and what’s so special about this paper is it has flocking on it, those stripes are actually flocking giving a lovely texture to the bookmark. This layer measures 19cm x 4.5cm ( 7 1/2″ x 1 3/4″) and has had all four corners rounded in the Detailed Trio Punch.

close up Santa's list bookmark

I stamped the Santa in Memento Tuxedo black ink and coloured with Stampin’ Blends before cutting him out with the matching die set. If your not a fan of colouring you can also die cut this Santa straight from the Designer Paper, making your project even quicker.

For some decoration I added some snowflakes from the same Santa’s Signpost Framelits set cut from the new Galvanized Metallic Paper. To finish off the book mark I threaded some of the new Poppy Parade Textured Weave Ribbon through the slit at the top of the bookmark and secured in place with some Linen Thread.

Santa's List bookmark 1

Hope you’ve enjoyed today’s project, pop back soon for more ideas with this suite as its my favourite from this years Autumn/Winter catalogue.

Happy Crafting

Joanne x


Holly Berry Background Card with Blended Seasons

Today I’m sharing another Christmas card made with the Blended Seasons Bundle of products. This time I used the holly stamp to create a back ground for my card and then I coloured it with Poppy Parade and Garden Green Stampin’ markers.

The gold embossed sentiment comes from the Snowflake Sentiments stamp set, which again I have added to my card using the gorgeous stitched frames from the Stitched Seasons die set. I will really miss these next month when they’re no longer available, so if you’re thinking about making purchase I would hurry before they sell out.

blended seasons xmas 2 flat

I added the bow die cut and a strip of Poppy Parade cardstock to make the card look like it was a Christmas present.

blended seasons xmas 2 inside

A little holly and a sentiment finish off the inside. Hope you’ve enjoyed today’s project.

Happy Crafting

Joanne x