Simple Snowman Season Card

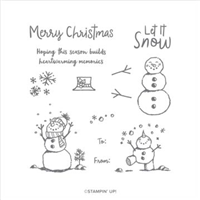
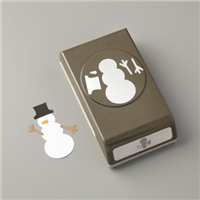
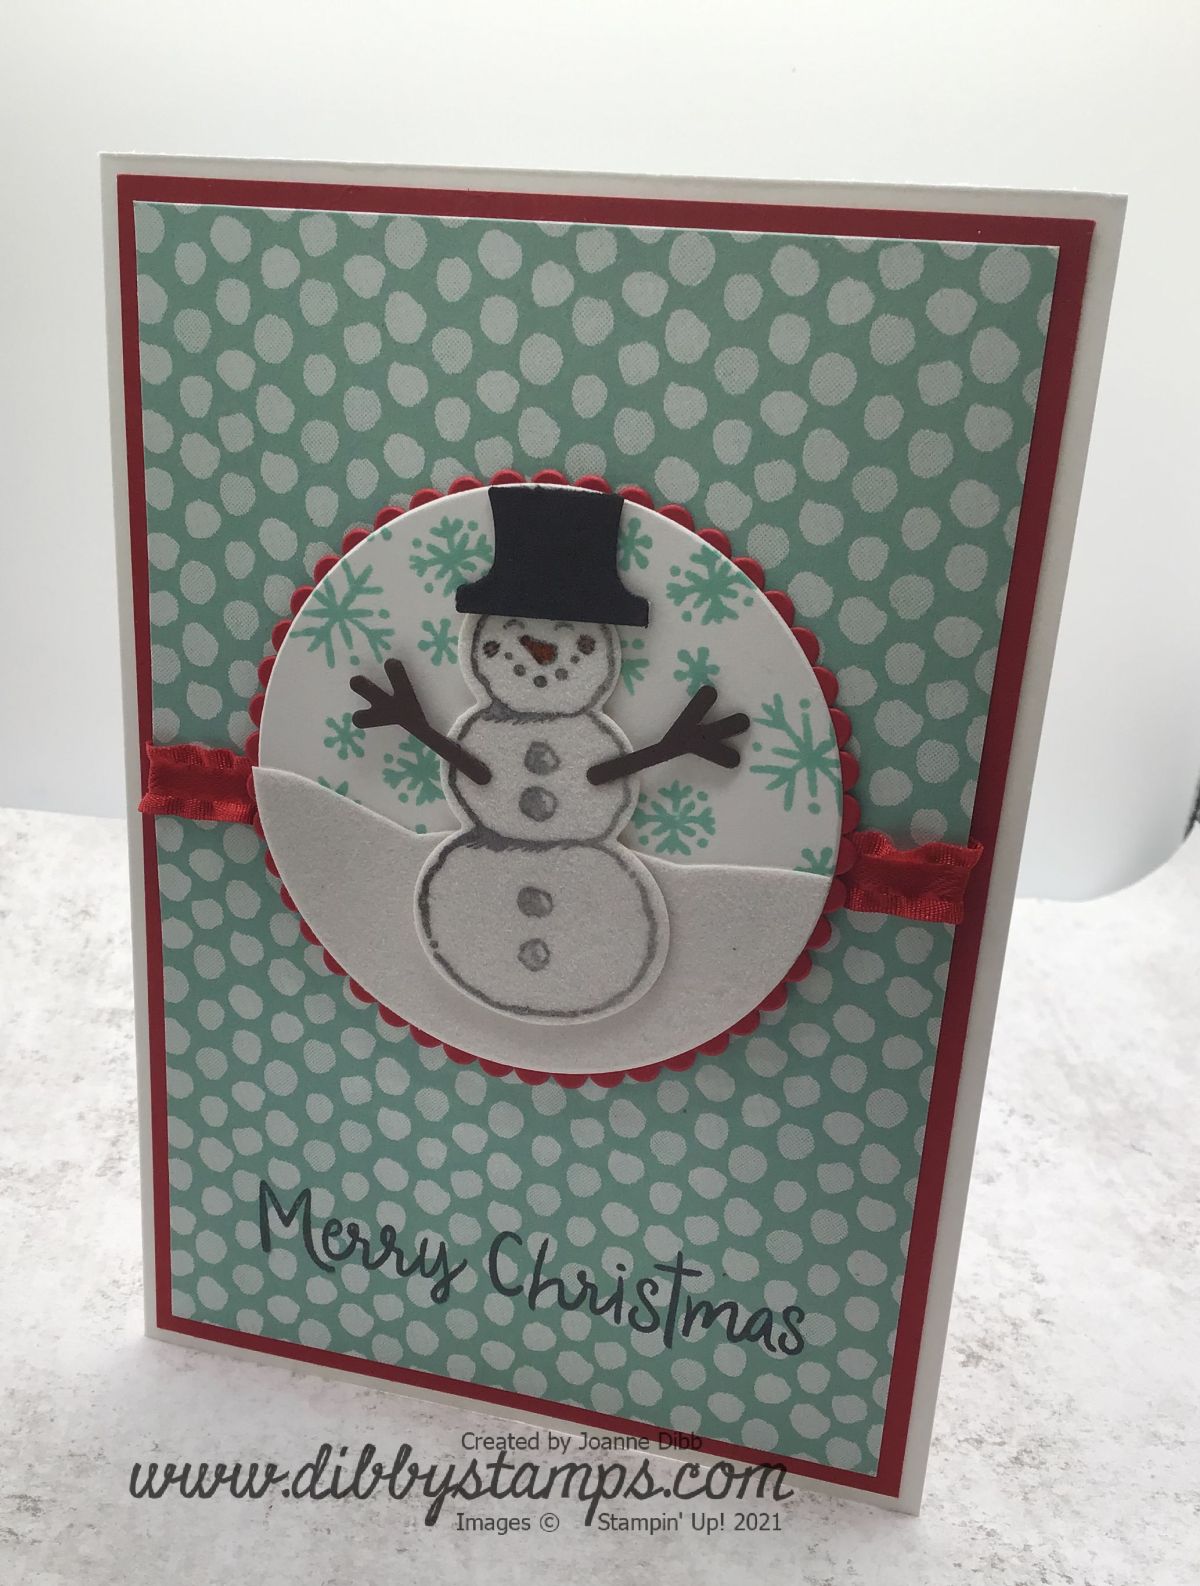
Here is a quick card made with the Snowman Season stamp set and Snowman Builder Punch, I’m so glad these carried over into our main catalogue as they are great for making quick cards.

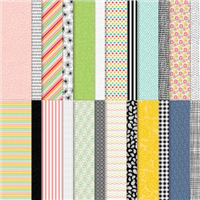
The background designer paper comes from the Pattern Party pack and I love how this pattern looks like snowballs.

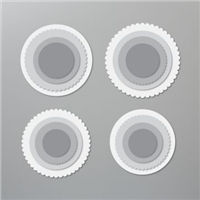
I stamped the snowman onto the new Snow White Velvet paper to add to the snowy effect I wanted. I then added him onto two Layered Circles, one in Real Red and one in white stamped with Pool Party snowflakes.

For a final touch I added some of the Real Red Mini Ruffled Ribbon and a touch of Pumpkin Pie Blends as every snowman needs a carrot for a nose right?

Happy Crafting

Joanne x

Supplies:

Peep Hole Card with Cute Halloween

I’m not someone who typically crafts for Halloween or who buys a lot a Halloween themed products, so there wont be too many original Halloween projects on this blog. Although I’ve caved this catalogue and bought the Frightfully Cute stamp set and the Cute Halloween DSP as they are very cut!

So here is one card I’ve made with these products so far:

Along with the Cute Halloween DSP and Frightfully Cute stamp I’ved added in the Picture This Dies to create the windows inthis card. I love all the cute litter critters in this paper and they work so well with the little stamps in the set.

There might be more Halloween projects from me but I’m not promising.

Happy Crafting

Joanne x

Supplies:

Bright Baubles Simple Inlay Card

I love the inlay technique so as soon as I recieved the Bright Baubles set I knew that exactly what the first card would entail. Using the mulitpurpose adhesive sheets makes this an easy card to make as you simply run the die through the Stampin’ Cut and Emboss one time for every colur you want to use.

I cut the main outline of the Bauble out of Shimmery White cardstock and then ran it through again with Mossy Meadow, Pool Party and Daffodil Delight for the star at the top.

I matted some of this Pear Pizzazz pattern from the Heartwarming Hugs DSP onto a layer of Mossy Meadow and on a Poppy Parade cardstock. I added a sentiment from the Bright Baubles onto some Shimmery White cardstock at the bottom of the card. As a final touch I added some of the Red Rhinestones as babules on the tree.

I love how this card turned out and hope to use the other baubles in the set soon and the same techinique soon.

Happy Crafting

Joanne x

Supplies:

Three Card Thursday: Penguin Playmates

The cute characters in the Penguin Playmates DSP are adorable but perhaps not the easiest to work with as they do involve some cutting. I love fussy cutting so creating these simple cards have given me a lot of joy to create.

I chose to base my cards around Soft Seaform and Just Jade which are the less prominant colours on these papers. although I’m a big fan of the Misty Moonlight and Fesh Freesia combination.

For this first card I’ve used the Layering Circles dies as a base fot the Polar Bear and Penguin to sit. The greeting is stamped onto a label from the Messages Die and it looks like they were made for each other.

This card featues a whole gang of playmates, I really wanted to add another fox but couldn’t see one facing into the centre of the card to sit on the left.

I thought this cute little chap deserved a card of his own too, so here he is using up a couple of paper scraps.

Which card is your favourite I’d love to know? Have you chosen the Penguin Playmates DSP as your Sale-A-Bration freebie yet? Only one week left until Sale-A-Bration ends this time.

Happy Crafting

Joanne x

Supplies:

Simple Bloom Where You’re Planted Card Duo

Today I’ve got a quick card made using the Bloom WhereYou’re Planted Designer Paper. This a great paper pack filled with images of house plants, pots and very versatile backgrounds. There is also a matching stamp and die bundle but today I’m just using the paper.

I’ve used the paper with all the potted plants on as my background, I’ve cut it so the large plant (sorry no idea of the name!) is central on the background. I then fussy cut out two extra plant from the paper.

Both cards have Evening Evergreen as the card base. I’ve then done one card with a Gray Granite layer and one with a Cinnamon Cider layer. Before adhering the designer paper to the matt layer I’ve added a length of the Evening Evergreen Chervon Weave Ribbon where I will place my sentiment.

I’ve stamped my greeting in Evening Evergreen onto Gray Granite or Cinnamon Cider and then cut them out with the large label die from the Potted Succulents Dies.

To finish the card I’ve adhered both the extra plant and the labels to the cards with Stampin’ dimensionals. Remember the Bloom Where You’re Planted Designer Paper currently has 15% off the price so a perfect time to buy.

Happy Crafting

Joanne x

Supplies