Penguins at the Northern Lights

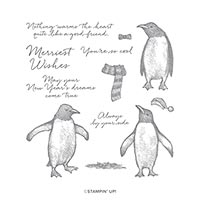
For today’s card I’ve taken inspiration from the Autumn/Winter catalogue and cased the sample for Playful Penguins on page 22. The background of this card reminded my of the Northern Lights and I’ve seen numerous cards featuring this effect so I decided to have ago myself.

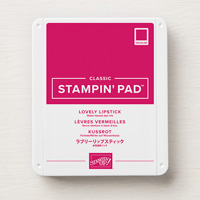
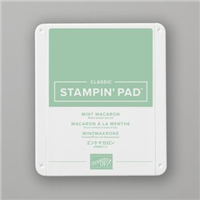
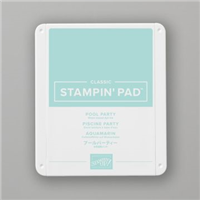
I used Shimmery White cardstock for my base as it has more of  coating on it making blending easier. I chose a colour palette of Mint Macaron and Lovely Lipstick as the “lights” colours and Night of Navy for the sky.

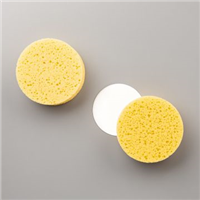
Firstly blend a layer of Lovely Lipstick ink across the middle of the card, followed underneath by a layer of Mint Macaron. I used a Stamping Sponge cut into quarters for my blending. I covered the rest of the card with layers of Night of Navy ink, lighlty going over the Mint Macaron and Lovely Lipstick and going darker towards the edges.

To add a star effect I used some of the Champagne Mist Shimmer Paint and flicked it across the blended cardstock using an old paintbrush.

Penguins NL Flat

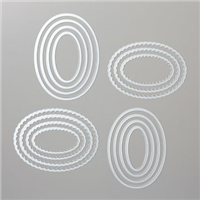
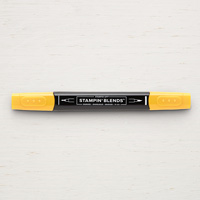
I fussy cut out two of the Playful Penguins and coloured their feet at beaks with some dark Mango Melody Stampin’ Blends. I stamped the greeting on an oval from the Layering Ovals dies and then tucked this under the penguins wings.

I love how this background turned out and can’t wait to make more cards with the same technique soon.

Happy Crafting

Joanne x

Basic Measurements:

Card Base: Half sheet A4 cardstock cut at 14.9cm x 21cm, scored at 10.5cm

Silver Foil Layer: 14.4cm x 10cm

Ink Blended Layer: 13.9cm x 9.5cm
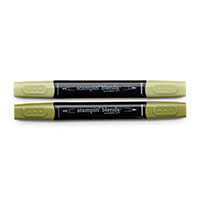
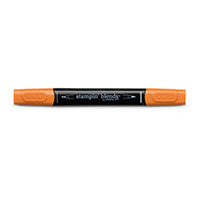
Supplies:


Simple Snowman Card

Today I’m featuring the products in the Let It Snow Suite again, focusing on the Snowman Builder Punch and the Let It Snow Embellishment Kit. I love this embellishment kit as it contains everything you need to turn a simple punched shape into a cute snowman with his own little felt hat.

Simple Snowman Card Close Up

For the background I simply stamped some of the snowflakes from the Snowman Season stamp set in Real Red ink on the Real Red cardstock to give a tone on tone look.

A strip of the Let It Snow Speciality DSP and a greeting stamped on the frame from the Wild Rose dies finishes the outside of the card.

Simple Snowman Card - Inside

A few snowflakes in Pool Party and a greeting in Real Red finish off the inside of the card.

Hope you’ve enjoyed this cute little project, the Let It Snow Embellishment kit is proving very popular so  if you want to have a play with it then I’d been ordering one soon.

Happy Crafting

Joanne x

Basic Measurement:

Card Base: Half A4 sheet cut to 14.9cm x 21cm, scored at 10.5cm

Supplies:


Yuletide Cheer with Holly Christmas Card

This Christmas card is fairly simple to put togther as long as you don’t mind at little fussy cutting for the holly leaves.

The background paper comes from the Come to Gather DSP, I love the linen effect of this paper and think it could work  for a variety of projects.

Yuletide Holly Close Up

Here’s a close up of the holly leaves coloured with Stampin’ Blends and the fussy cut out. I love a bit of fussy cutting, especially at this time of year when I’m spending cosy nights in front of the fire. If you’re not a fan of fussy cutting then you could use the holly berry stamp and dies from the Free Skate Bundle.

Yuletide Holly Card flat

The greeting and frame come from the Frosted Foliage Bundle which contains some lovely sentiments.Basic Measurements:

A simple card which is easy to replicate if you want to make a sttart on those Christmas cards.

Happy Crafting

Joanne x

Basic Measurements:

Card Base: Half A4 sheet, cut to 14.9cm x 21cm, scored at 10.5cm

Real Red Layer: 14.4cm x 10cm

DSP Layer: 13.9cm x 9.5cm

Supplies:


Snowmen Card Duo

What better way to celebrate the first frosty morning of the season than with two gorgeous snowman cards. Both of these cards were very simple to make but and bright and cheery and perfect for celebrating the snowy season.

I’m drawn to the Snowmen sets every year but I think Snowman Season could easily be my favourite by Christmas. I love all the matching products in the Let It Snow Suite, especially the punch which makes snowman building so easy. Added bonus my daughter has love punching her own snowmen and giving them their own little faces so its a winner all round.

Snowman Stripes Card

I love the colour combination of the Let It Snow Speciality DSP, Real Red, Coastal Caana, Flirty Flamingo, Shaded Spruce, Blueberry Bushell, Basic Black and Whisper White make a fresh modern twist on the traditional red and green Christmas combinations.

Each of these cards features a background in these papers to highlight how yummy they are. I love all the little mittens on the card below.

Snowman Mittens Card

I little colouring with the Stampin’ Blends and a greeting from the Christmas Gleaming stamp set and the card is done.

Look out for more snowmen appearing soon.

Happy Crafting

Joanne x

Basic Measurements:

Card Base: Half A4 sheet cut to 14.9cm x 21cm, scored at 10.5cm

Matt Layer: 14.4cm x 10 cm

DSP Layer: 13.9cm x 9.5cm

Supplies:


Merry Mistletoe Christmas Card with Buffalo Check

Today’s project has been brewing in my head ever since I saw the Buffalo Check stamp, its pattern is very similar to one in the Under the Mistletoe DSP pack, so I decided to use it as a background for this simple Mistletoe card.

The Mistletoe Season stamp set is the perfect one for beginners and avid crafters alike to use as there are so many gorgeous combinations you can come up with. I’ve used the two mistletoe sprigs for the main focal point of this card. These are two-step stamps with a difference, they don’t completely line up, making them a great starting point for beginners.

Mistletoe Season Card flat

I stamped my outline mistletoe in Pear Pizzazz and then took the filler stamp, inked with Pear Pizzazz again but stamped off on scrap paper before stamping on my image. I love how the two-tone image gives the card some depth.

A simple bow stamped in Real Red finishes off the main image. As mentioned above my background was created with the Buffalo Check stamp again with Pear Pizzazz. The Merry Christmas greeting in the bottom corner adds a greeting. To finish the card I added three clusters of the white enamel dots in the Santa’s Workshop Enamel Shapes to perfectly replicate mistletoe berries.  A simple card which is quick and easy to replicate for those last minute cards you need to make.

Happy Crafting

Joanne x